Table of Contents
The schedule comparison tool is used to find differences between two schedules. It is assumed that the two schedules are on the same timeline. The tool is used to identify differences that may be worth further investigation. To run this report, there are two requirements - you must have 2 projects within a project set and the checkbox noting All files are snapshots of the same schedule must be checked.
From the Report Gallery, select Schedule Compare under the Comparison section and click the Add link at the top of the Schedule Compare Information page.
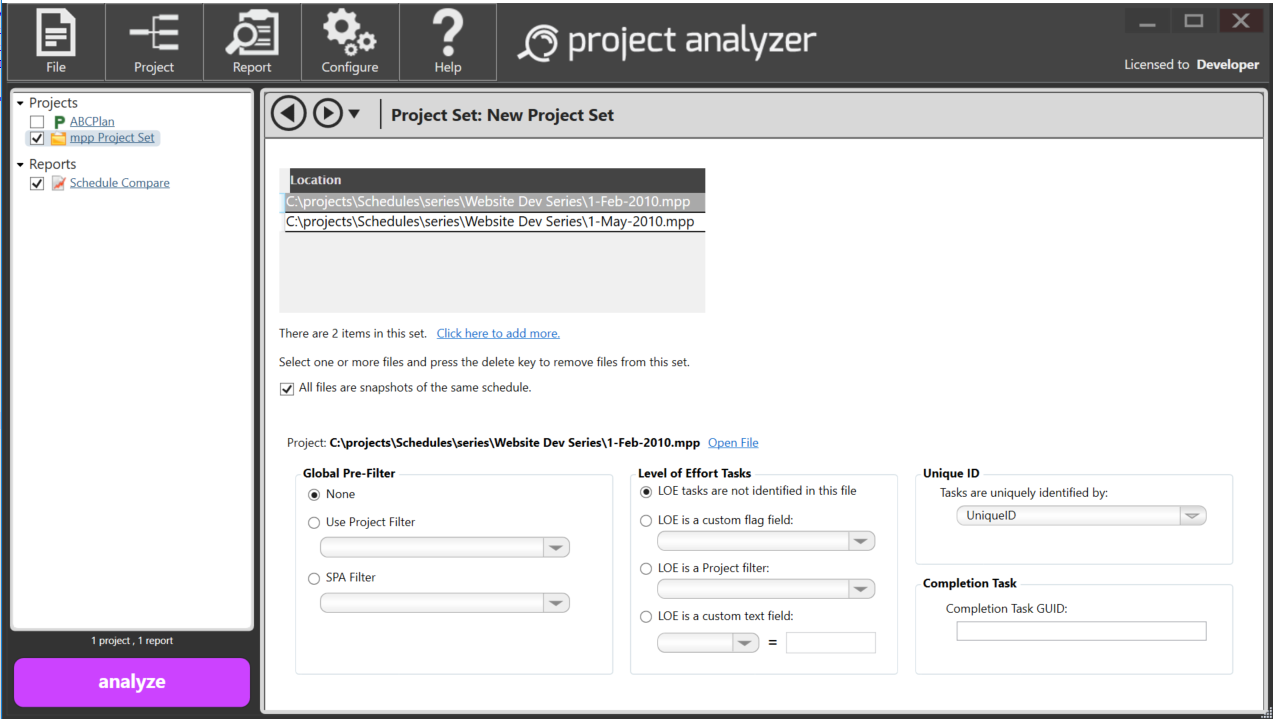
Before running the Schedule Compare report, you will want to identify how tasks are uniquely identified. Steelray Project Analyzer supports unique ID identification in various fields. The unique ID field is selected on the Project Settings page. When you click a project in the Projects list, the Unique ID selection is located in the top right corner of the Project Settings page.
By default, we assume the task's "UniqueID" column as the unique ID, except for XER projects when the Unique ID will default to the "Text1" field. However, if you have identified the unique ID in user defined field such as any of the text or number fields, you may select those as well.
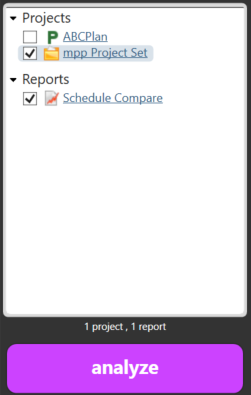
Select the project set containing the two projects to compare from the Projects heading by checking the box to its left. Then, select the newly created Schedule Compare report from the Reports heading, and click Analyze.
The report begins by showing which schedule is considered to be Schedule 1 (the baseline), and which is Schedule 2 (the revised). You should always make sure that the schedules are in the correct order. If the schedules are backwards (Schedule 1 should be Schedule 2 and vice versa), click the Flip Schedules button.
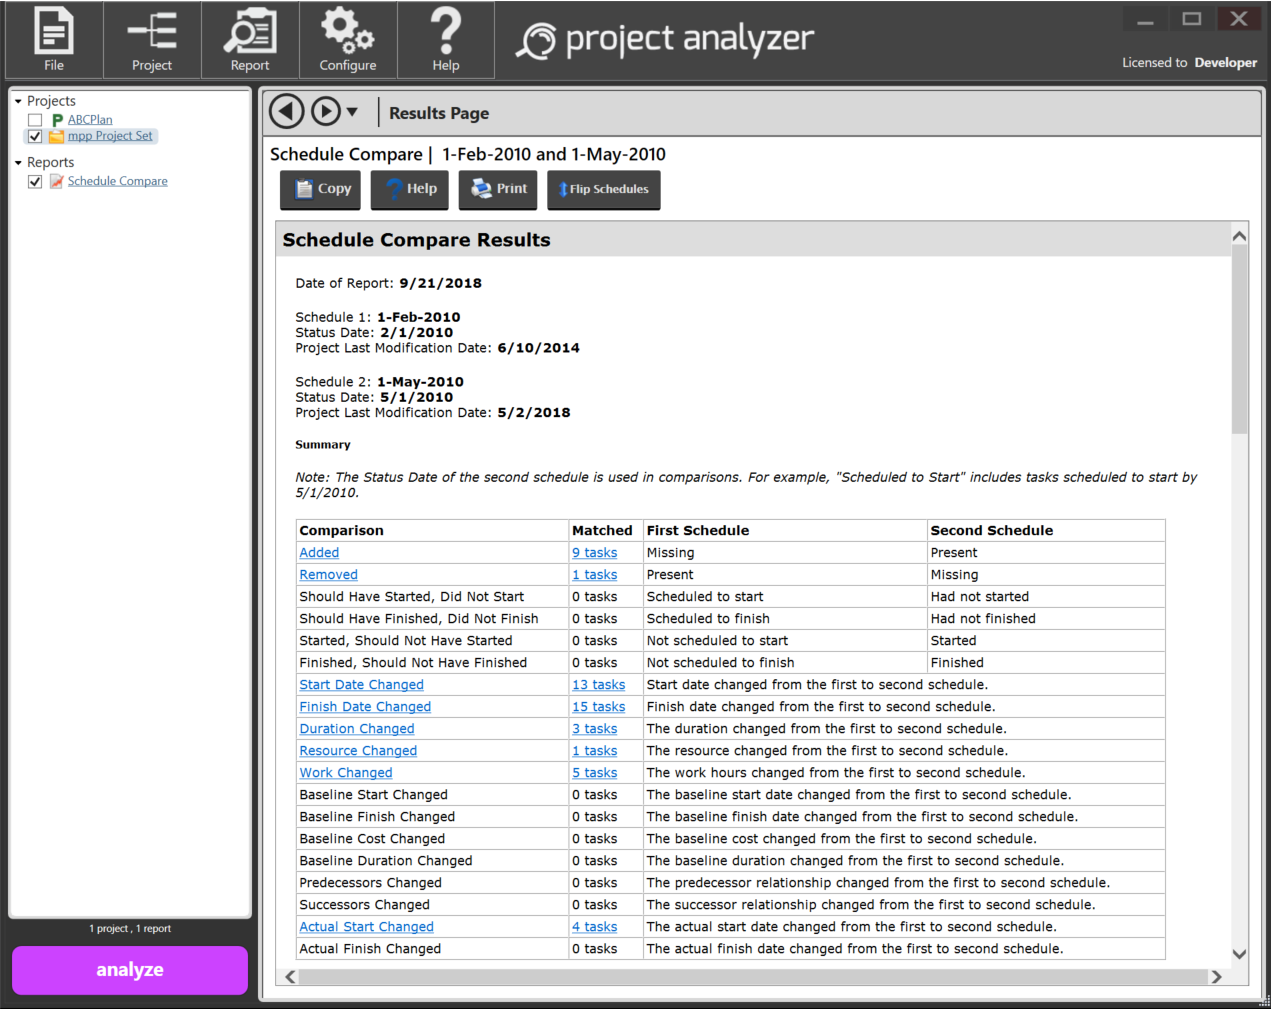
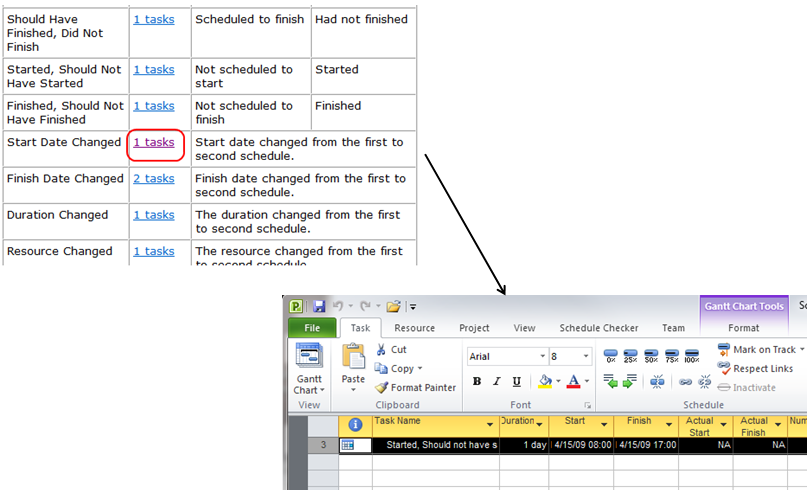
The next section of the report is the changes Summary table. The Comparison column lists the category name. If there is at least one task matched by the category, the category name will be a link to a detail task table that appears later in the report. The Matched column contains the number of tasks matched by the category. If greater than 0, this number will be a link that filters the matched tasks in either Schedule 1 or Schedule 2 (depending on the category). The First Schedule and Second Schedule columns describe what tasks the category will match. For example, the values of these columns for the Added category are "missing" and "present," meaning that tasks in this category are missing from Schedule 1 but are present in Schedule 2.
After the Summary table comes the detail task tables. These tables list the tasks matched by each category, with columns that list exactly what changed for the task between Schedule 1 and Schedule 2.
If the comparison was run from Microsoft Project or Project Server, Project Analyzer provides the capability to filter the matching tasks within Microsoft Project so that you may quickly identify possible offenders. The left hand schedule is loaded by Project.